Let’s Make Some Stock
At work we had something of a “talent show” where some of my colleagues got to show off something they’re passionate about. I decided to throw my hat into the ring and hopefully teach some people how to make a pretty damn delicious chicken broth – the base of so many things when it comes to food.
It’s great to work at an organization that puts company culture on the forefront, so naturally I’ll give a quick shout out to TrueContext and all the fun we have. That said, the rest of this is going to be adapted from the 15 minute presentation I gave to my colleagues. It’ll include a step-by-step guide on making a mouthwatering stock, some tips I wasn’t able to cover in the presentation, and some helpful links for further learning.
What Exactly Is Stock, or Broth, And Why Do I Care?
This is really up for debate depending on who you ask, but it’s all more or less a collection of bones, meat scraps, and aromatic vegetables simmered for hours in fresh water to create a delicious liquid that’s as versatile as duct tape. I don’t want to get into the semantics of what the real differences are between stocks and broths as that isn’t really important here. What I’ll be focusing on is the basic method to get some outstanding results, along with a handful of tips and tricks along the way to maximize your experience.
Chicken stock is one of the easiest and most versatile things you can do for yourself in the kitchen. Up until recently, you could typically buy this stuff at your local supermarket for about $1.00 / 900ml carton. Nowadays that same carton is selling for $3.00 for the cheap stuff, or upwards of $10.00 for the “premium” or “organic” varieties. It’s all a rip off, plus you can do better at home for pennies.
By making your own stocks and broth is something even the most amateur cook can do, and it’s a great place to get started. All you’ll really need is a big soup pot, some scraps from vegetables (and, ideally some meat scraps too), some vessel to store it in, and a little bit of time. I suggest a lazy weekend day, but that’s up to you.
What About Those Bullion Cubes?
No. Just. NO. If you’re in an absolute pinch I suppose they could work, but please use these as an absolute last resort. They’re almost entirely salt, sugar, and chemicals. They taste like trash, because that’s where they belong. In fact, you shouldn’t even have them in your cupboard. Pretend like they don’t exist, for the betterment of your health, your taste buds, and humanity in general.
Smart Shopping For Ingredients
Thanks to corporate greed unlike any of us have seen in our lifetimes, groceries are more expensive than ever. But, they don’t need to be. We can beat (some of) the system by rolling up our sleeves and getting back to basics.
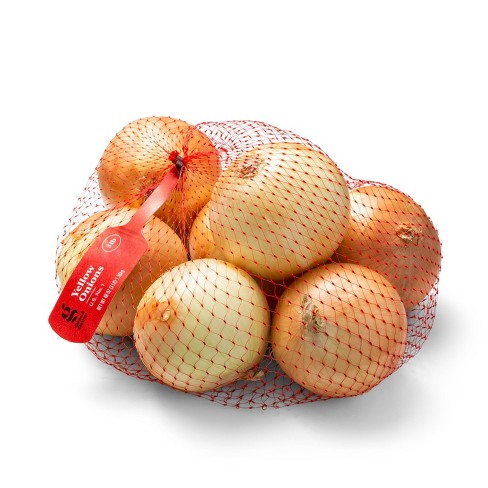
You’ll want to start off with what is commonly referred to as the “holy trinity” of veggies – that is, carrots, onions, and celery. Carrots are plentiful and easily purchased in 2-5lb bags for a couple bucks at most. Onions are much the same, and should be about $1/lb when bought in 2-5lb bags. You just need your everyday generic yellow cooking onions. Celery is hit and miss on cost, but should generally run you around $3 for a head. Then comes your herbs. One of the worst things you can do here is buy the small plastic clamshells of overpriced herbs for $4+ each. Disgusting! Instead, consider buying pre-potted herbs which should be available at some stores. Keep them in your window and learn how to care for them, how to water them, and how to harvest when you need. You’ll have an endless supply of “expensive” herbs for the cost of a a couple minutes of time every few days to tend to them.
Ditch The Grocery Store
I’m just going to be blunt. If you can, avoid large grocers as much as humanly possible. Turn your focus on small independent markets, farmer’s markets, and especially ethnic markets. They are getting all the same produce from the same distributors, but they’re not inflating the price to appease their ultra-wealthy shareholders. You’ll find the same stuff at 2/3 the price or even 1/2 the price.
In Toronto, I highly suggest visiting one of the two “china-town” strips of grocers, or places such as Kensington Market. I only step foot into a larger chain for a very select few ingredients each month, and even then, I try and limit what I’m buying.
Saving Your Scraps
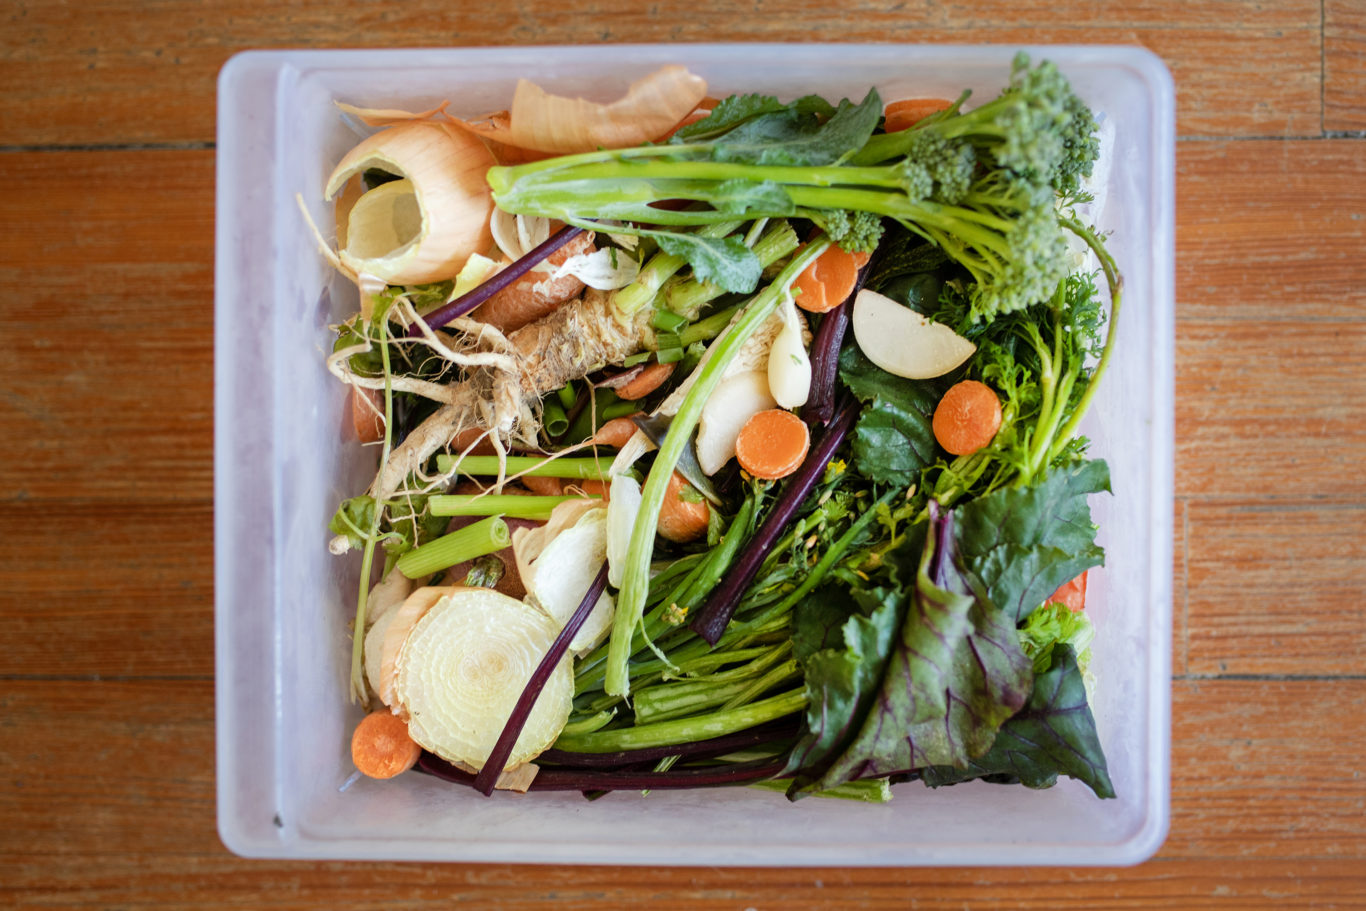
In the weeks or even months prior to making a stock you’ll want to save your vegetable and meat scraps. Get yourself some of those big ziplock bags and begin filling them with all your vegetable scraps and peels. You want to save nearly everything, but especially aromatics such as garlic, onions, carrots, celery and herbs. The peels from your carrots, the little bits of celery you chop off, the peels from your onions and garlic, save it all. Stems from broccoli, the core from bell peppers, the stems of spinach, or the inedible fibrous green parts of leeks all work too. The only thing you DON’T want to save is potatoes or potato peels as they’ll actually make your stock bitter. Keep saving these up until you have a good solid bag full, and keep it in the freezer until you’re ready to use it.
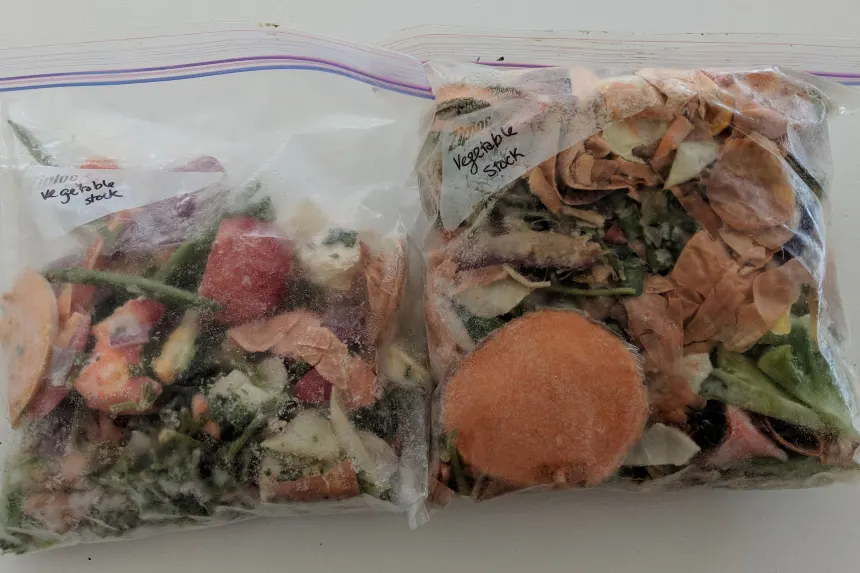
In a second (or even third) bag, keep things like bones from various meats. Did you cook an entire chicken and are left with the carcass and all those little bits of meat and skin that you don’t eat? Put that in a freezer bag. Had chicken wings and have a bowl of bones? Keep those too! How about a prime rib? Keep those bones!
By now you should have a good bag or two of vegetable scraps and bones ready to be used in your freezer, so you’re set to get started.
Basic Tools Needed
To make a stock, you really don’t need any fancy tools. You’ll likely have everything you need laying around any basic kitchen, and even if you don’t, you can likely pick a lot of these things up for cheap from most retailers. For an additional cost saving trick, try looking at thrift stores! You’ll find a wide range of things for a couple bucks. Here’s a quick list (with some Amazon links to make it easy). I only post Amazon links to help you see what items are, I would advocate to find more ethical or local retailers for these items if possible.
- Deep soup or stock pot (10 quart minimum, ideally)
- Oven Roasting Sheet
- General chopping knife & cutting board
- Fine mesh strainer or Cheesecloth
- Soup Ladle
- Plastic Deli Containers
Realistically, you can ditch the deli containers if you save your own containers from takeout orders. Better yet, save your old yogurt, sour cream, and other plastic containers with lids. They stack fabulously in the cupboard, and you can use them over and over again for free. These shouldn’t be in the landfill – keep them, they’re useful!
Get Yourself Prepared
Like nearly everything in cooking, the French have a saying. When it comes to preparation, it’s called “Mise En Place” which is the fancy way of saying “everything in it’s place”. This means you have your ingredients portioned, prepared, and ready for use. This way you’re not looking for things, you’re not caught up with steps to complete when you need an ingredient now, it’s just there, ready, and you’re good to go.
To get your “mise en place” ready, you’ll want to defrost your veggies, and have them roughly chopped. You’ll want to get that old frozen chicken bones and break them apart into pieces. You’ll want your herbs set aside, along with aromatics such as bay leaves, and pepper.
Roast Your Ingredients
You’ll want to separate your meats from your vegetables and lay them out on separate baking trays. Bring your oven up to 450 degrees (or set to “broil” if you have the setting). Slide your baking trays into the oven, and leave them to roast for about 10-15 minutes.
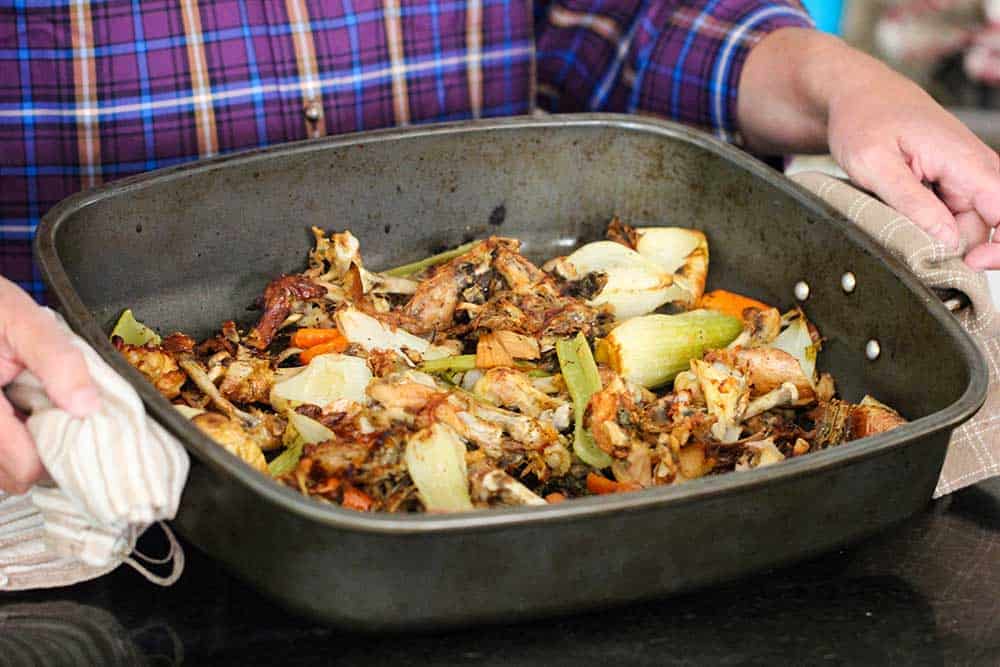
You’ll want to get a little bit of browning on some of the vegetables, but just before they begin to turn black. This will likely occur around the 15 minute mark, but it could take a bit longer depending on the size and thickness of the item.
When it comes to the meats and especially bones, you’ll probably need to roast them a bit longer. If you get some blackened bits on your bones that’s right around the place you’re looking for, but you don’t want to actually burn anything. If you do, just pick (or scrape) those parts off and keep moving forward.
This step is important as it’s what helps bring out a ton of flavour!
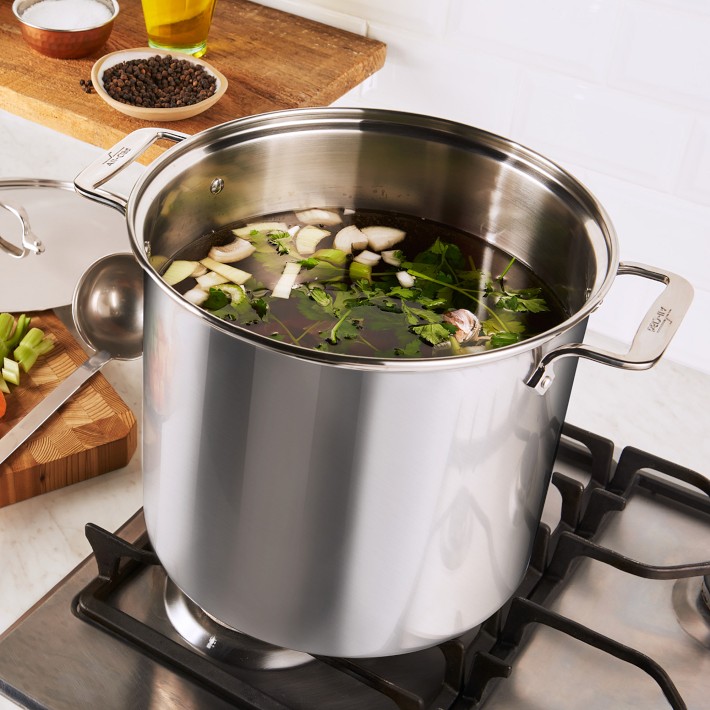
Everyone In!
You’ve got your veggies and bones roasted, so let’s get them into a big soup pot. You don’t want to overload your pot, but about 1/3 to 1/2 full of ingredients (not packed down) is about where you want to be. Fill the rest of the pot up with fresh COLD water from the tap.
You’ll want to use cold water as it’ll help slowly release the flavours from your ingredients, which means better results in the end. You can also add 2 bay leaves, some whole peppercorns, or any other herbs that you feel would be helpful. Parsley stems are an excellent addition, so be sure to keep those in your scraps! The one thing you don’t want to add is any salt as that’s something you can adjust in the end when you go to use your finished product.
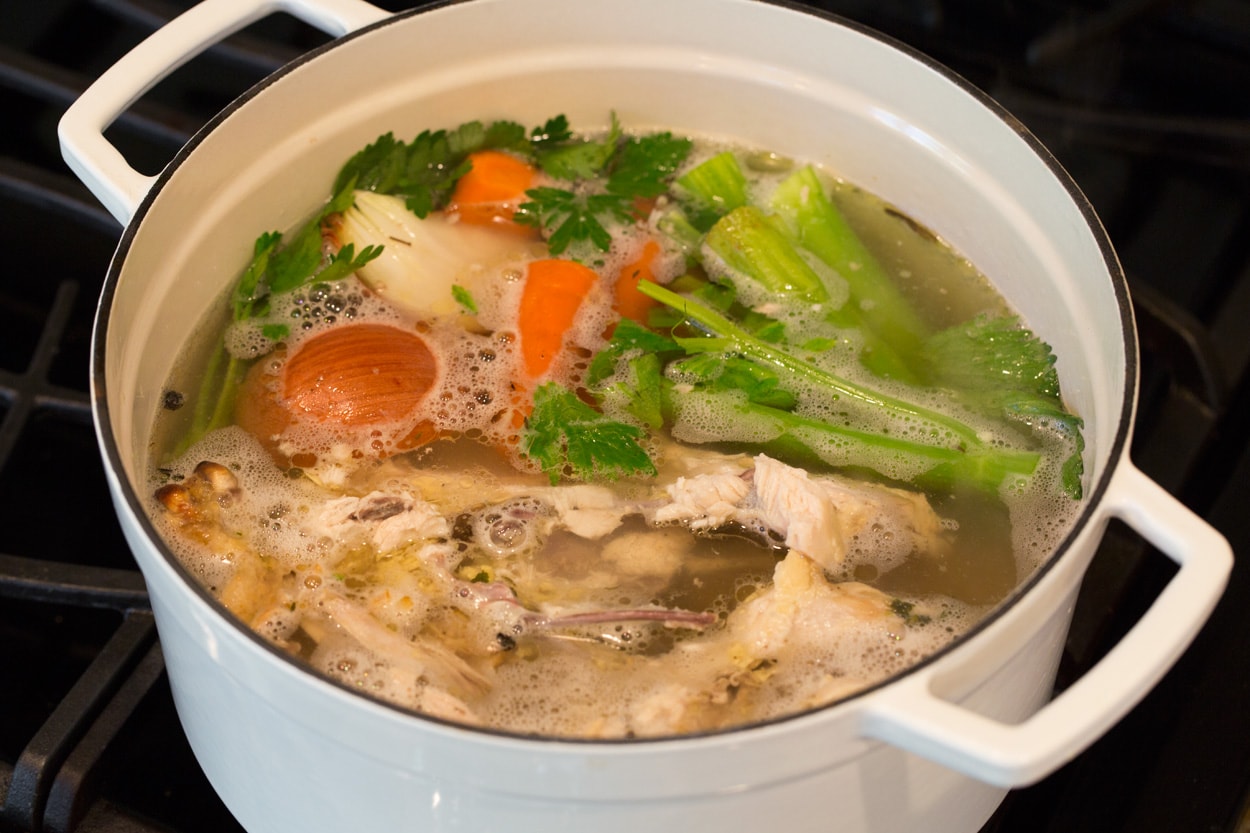
Bring this pot up to a boil and then immediately reduce the heat to low where the whole thing should simmer. You’re looking for the water to be just barely bubbling, with a little bit of steam coming off it. Add your lid (this is IMPORTANT to prevent evaporation), pour yourself a glass of your favourite wine, and relax for 2 hours while it does it’s thing.
From time to time, you’ll want to check on it, use a wooden spoon or spatula to make sure nothing is stuck to the bottom of the pot and just give it a bit of a stir every 20-30 minutes or so. When doing this, it can be helpful to skim off any fat or little white bubbles that are forming. In stocks you want to try and remove the fat to make more of a clarified end product. Removing the fat is pretty simple, but a bit of a time consuming process by using a soup ladle or large spoon, barely immersing one side of it into the liquid to kind of “suck up” the fat layer onto the spoon, which you’ll discard. If you’re really fancy, you can invest in a fat skimmer, or fat separator that’s meant for this type of thing, but a simple spoon will also do the trick without spending additional money. If you want the “easy” way out, you can employ a trick like this once things completely cool down.
Finishing Up
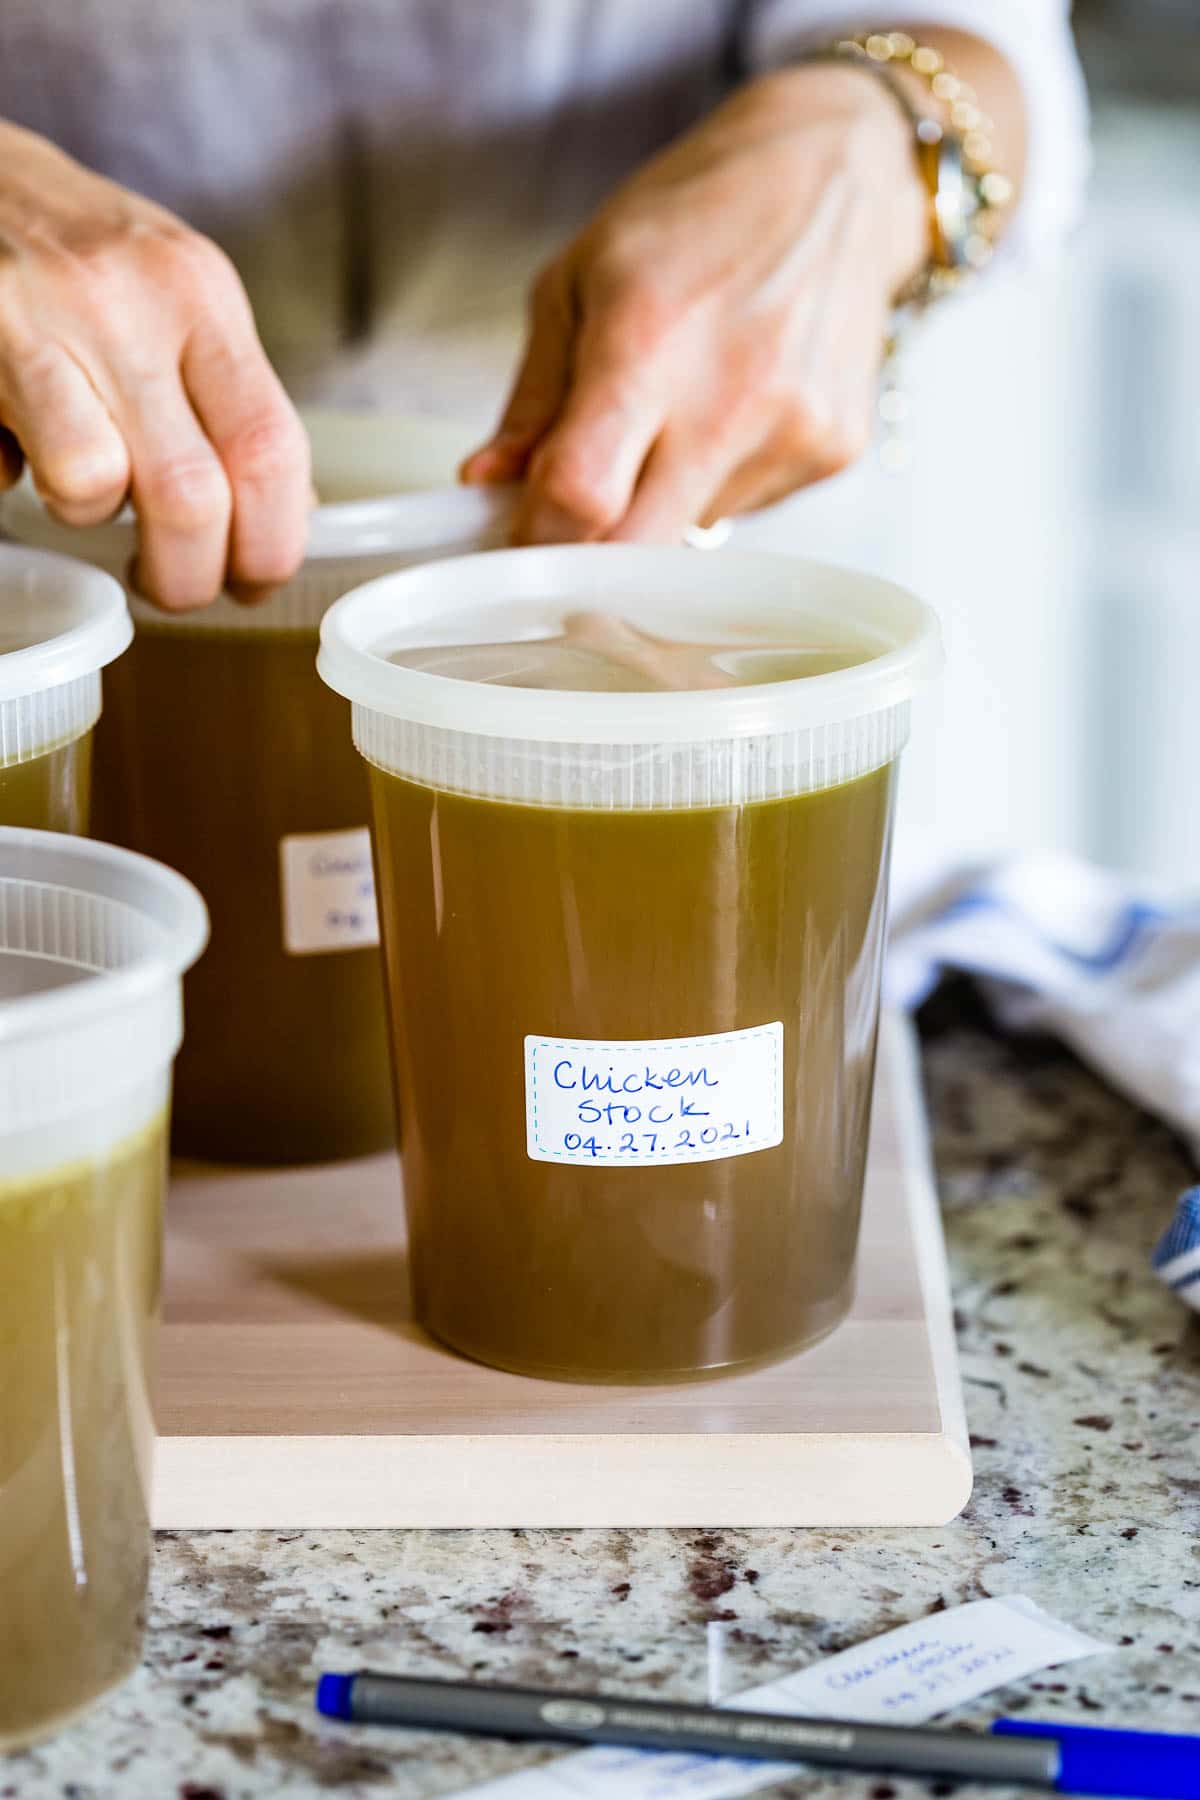
After 2-3 hours, you should have a nice rich and brown liquid simmering away in your pot. Turn the heat off, and let it sit for a couple minutes while you begin to prep your storage containers. You’ll typically want to use plastic containers such as “deli containers“, which come in many different sizes. I personally prefer to use 16oz containers as they are the most flexible in terms of size. If you use only big containers, you may be storing them in sizes too large for most recipes, and if you use small ones, you’ll be using a ton of containers. These can easily be purchased from Amazon or other online retailers, but for a more frugal (and environmentally conscious method), be sure to save all your old yogurt, ice cream, and takeout containers. They stack fabulously and take up very little space, plus they’re super useful for nearly any storage needs – food or otherwise! Be sure to only use plastic as you’ll be freezing these and glass doesn’t do well in the freezer unless you’re looking for a disaster.
Using a slotted spoon or other type utensil, fish out all the large ingredients from your stock pot and discard these into your green bin (you are keeping a green bin, right?). Don’t worry about the little bits that might be floating around, we’ll deal with those in a minute – you’re only really concerned with the bigger items.
Now, using some cheesecloth or a fine mesh strainer, you can begin to slowly pour your stock through this filter of your choice and into the various storage containers. What you should see come through is a nice rich and brown(ish) liquid which is essentially a flavour bomb.
Let these sit and cool on the counter until they’re room temperature. This will likely take a couple hours, or possibly even overnight. Don’t worry about leaving them out for a couple hours – it’ll be fine.
Once they’re cooled, you want to add the lids, and be sure to put a stick on the container to mark what it is, along with the date so you know when it was made. Just a simple piece of masking tape will suffice, but you can also buy some blank stickers for cheap.
Now you can stack them in your freezer for up to a year, or keep them in your fridge for up to 4-5 days.
You’ve Now Got Liquid Gold!
Just like that, you’ve got yourself some amazing chicken stock that’s ready for any recipe that requires a big punch of flavour. Your stock should be a nice deep brownish colour. They’ll elevate your soup, gravy, or any place that asks for stock. A cool little trick I’ve used in the past is to use some stock in place of water when making rice. It’s a great chance for you to really kick up the flavour in your rice, especially when you’re making a rice base for a chicken and veggie dish.
Ready For More?
When you’re ready to really put your new stock to a great use, look up some fabulous recipes for soups! You’re already half way there with your stock, so why not check out some great resources to further your cooking skills? I’ve listed a handful of my YouTube channels I’ve found helpful in the past with a little explanation for each.
- Not Another Cooking Show – Simple, straight to the point, with easy recipes
- Fallow – Two guys from a finer dining UK restaurant. Great to learn techniques!
- Billy Parisi – Easy to digest content, simple tips, and not a lot of “fluff”
- Glen & Friends – An Ontario based channel! They explore all kinds of forgotten classics.
- Binging With Babbish – A popular channel, lots of great info, but I’m not a fan of some of his more recent content comparing foods or making stupid renditions of others.
- Brian Lagerstron – Another great channel teaching the basics and technique
- America’s Test Kitchen – A MASSIVE resource for everything food.
- French Cooking Academy – When you really want to get fancy
If you prefer something a little more tactile, there’s a handful of cookbooks I’d highly suggest to get you going. You certainly don’t need them all, but any one of these would be a wonderful addition to any kitchen. I always find it good to flip through the pages and bookmark a few things you find interesting. The best thing you can do is work on the parts of the book that tech technique. If you can master things like shallow frying, or how to braise meat, or how to properly cook and season different items, you will elevate your cooking to levels you never thought possible. It’s ALL about technique!
- Anything by Julia Child – Considered on of the largest forces in the kitchen ever, if you can learn her recipes, you’re going to blow yourself away.
- America’s Test Kitchen / Cooks Illustrated (Magazine) – A monthly subscription, these books are invaluable. They cover everything from recipes to what cookware to buy, review kitchen gadgets, and give you the low down on everything from different types of rice, to how to use each type of vinegar.
- Josh Weissman – I’m not a big fan of his YouTube channel, but his books are outstanding at understanding technique, and how to apply it to your cooking.
- How To Cook Everything : Mark Bittman – A staple in any kitchen
- The Food Lab – Another staple that’ll teach you more than you’ll remember.
- Thug Kitchen (Vegan) – A great vegan based cookbook series with great ideas
- The Joy Of Cooking – The cookbook your grandmother had. And, for good reason.
However, more than anything – why not take advantage of your local library? A membership is free, and you’ll have access to hundreds of cookbooks, all for free! Test out a few that are of interest, and return them, all at no cost! Take some photos of things you like, look up more from that author, and consider buying one at some point. The best cookbooks are the ones you use.
Final Words
Learning how to cook has arguably been one of the best things I’ve done. It’s certainly one of the most rewarding, and it’s changed my life for the better in a considerable way. I find inspiration in all kinds of places, with one of the first being Anthony Bourdain. I urge anyone to watch his shows, namely Parts Unknown, although with “No Reservations” coming in a close second. There’s a reason he’s so sorely missed in this world. I used to watch (and still do) on the edge of the couch thinking “oh, I MUST learn how to make THAT“.
From there, I look up that dish. I read or watch some recipes, but not just one, many. I learn the similarities between them, and then begin to work out my own method to make the dish, taking bits and pieces from each one to put my own spin on it. As you explore yourself, you’ll learn what works and what doesn’t. Cooking is an adventure. It’s an art, and one you’ll continually get better at the more you practice.
I keep a collection of cookbooks I value and refer to all the time, but one of my best resources is a little cookbook of my own recipes or copies of ones I’ve loved the most. I can look at it any day of the week when I need some help deciding what to make. You can do this the old fashioned way with cue cards and a pen, but I’ve decided to build my own online cookbook using an app called “Mealie“. It takes some technical know-how to make, but they’re releasing a hosted version you can sign up for in the near future called “Recipinned” so keep your eyes open for that.
And, last but not least – reach out to me with questions. I’d love to talk food, and if I can help your journey in food in any way, that would make me immensely happy!


Leave a Reply